Updating Your MyTMB Account Info
Login Captcha
Before you can make account changes, your identity must be re-verified to ensure the account is
not hacked. Enter the code below and your password to verify.
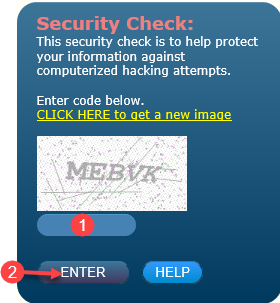
- Enter the CAPTCHA image or code displayed into the text box labeled 1. The text you
enter is not case sensitive.
- Click ENTER.
NOTE: If you are unable to read the Security Check image, click
on “CLICK HERE to get a new image” to generate a new code. You may generate a new code as many
times as you need.
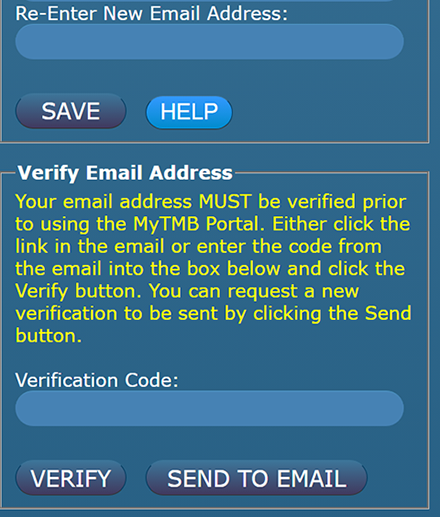
Update Email Address
You must verify your email address before you can update your email address.
Follow the steps provided below to update your Email Address.
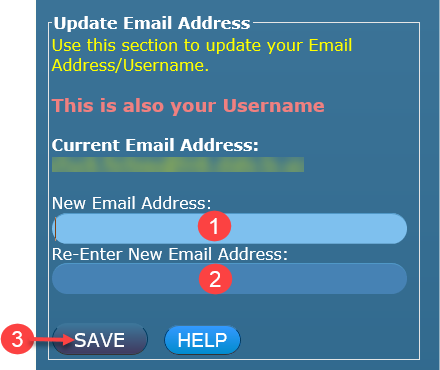
- Enter your NEW Email Address.
- Re-Enter your NEW Email Address.
- Select SAVE.
NOTE: If your changes are not saved, scroll back to the top of the
active window and look for an error message similar to the one below.

Update Password
Follow the steps provided below to change your Password.
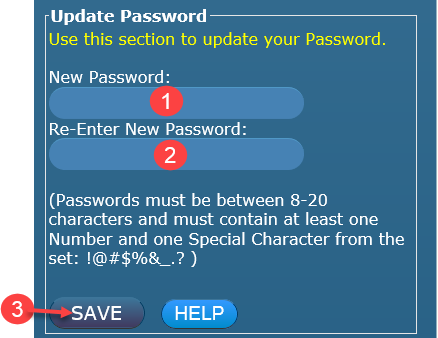
- Enter your NEW Password.
- Re-Enter your NEW Password.
- Select SAVE.
NOTE: Password must be between 8-20 characters and must contain at least one Number
and one Special Character for the set: !@#$%&_.? )
If your changes are not saved, scroll back to the top of the active window and
look for an error message similar to the one below.

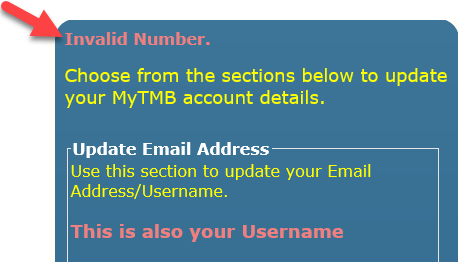
Update Contact Phone Number
Follow the steps provided below to change your Phone Number.
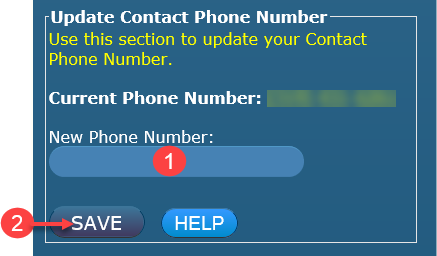
- Enter new phone number.
- Click SAVE.
NOTE: MyTMB accepts international phone numbers. Enter + before
the number. You will have more than 10 digits. Example +12345678901
NOTE: If your changes are not saved, scroll back to the top of the
active window and look for an error message similar to the one below.

Update Security Questions
Security Questions must be selected and answered to help keep your account safe.
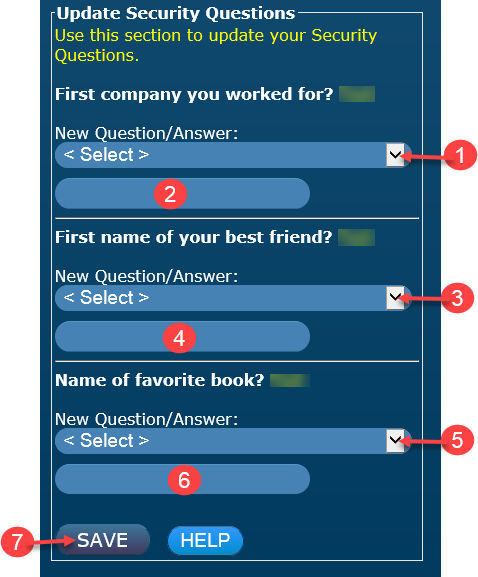
NOTE: You cannot select the same question more than once.
- Select a Security Question from the drop down list.
- Type your answer to question selected.
- Select a Security Question from the drop down list.
- Type your answer to question selected.
- Select a Security Question from the drop down list.
- Type your answer to question selected.
- Select Save.
NOTE: If your changes are not saved, scroll back to the top of the active window and look for an error message similar to the one below.

Update Contact Address
The contact address is the address you want associated with your account. Please remember that your
practice address may change over the life of your license and you should not use that here. This
address may receive correspondence about your account. Follow the steps provided below to change your Contact Address.
Click on the following image that is shown on your screen:

OR

Auto Complete Mode is enabled
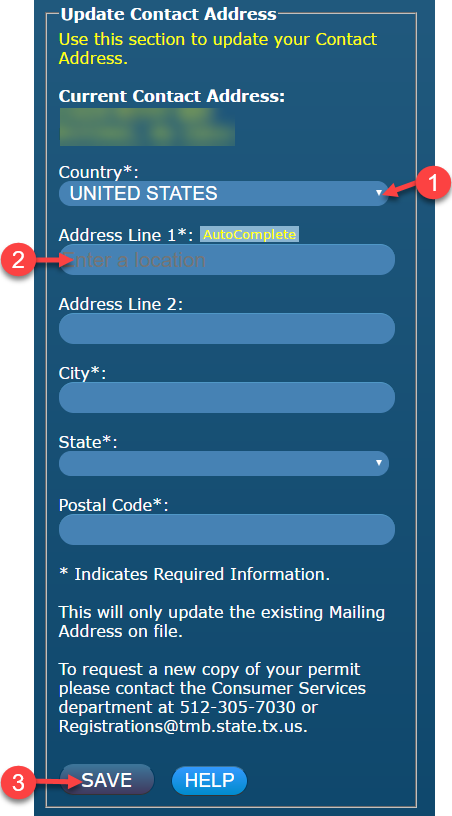
NOTE: MyTMB supports international addresses. You must select the Country first and the option to select International Locality will appear.
Manual Mode is enabled
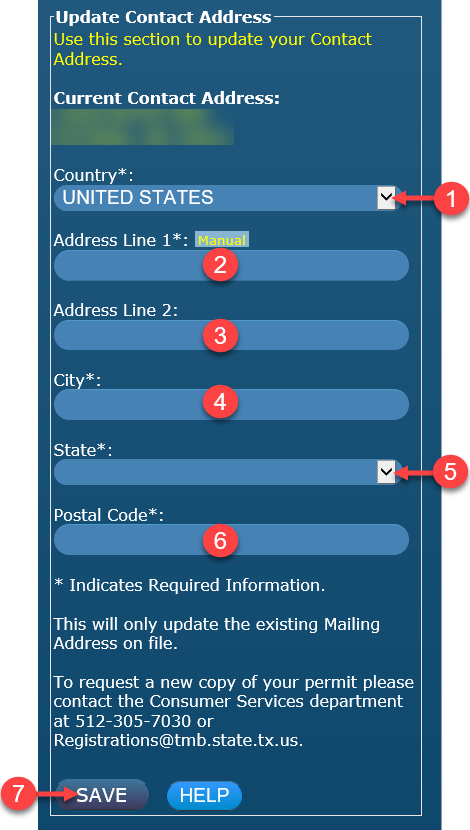
- Select Country from the drop down menu.
- Enter physical address or P.O. Box number.
- Enter Suite or Apt. number if needed.
- Enter City.
- Select State from the drop down menu.
- Enter Zip Code.
- Select SAVE.
NOTE: MyTMB supports international addresses. You must select the Country first and the option
to select International Locality will appear.
If your changes are not saved, scroll back to the top of the active window and look for an error message similar to the one below.
After any changes have been made, you must select SAVE in the section you are updating. If no changes are needed, select Return to Portal.

NOTE: If you select RETURN TO PORTAL without selecting SAVE, your information will not be saved.
If your changes are not saved, scroll back to the top of the active window and look for an error message similar to the one below.